Tarrytown Light

When I realized my daughter would need to make a trip to Pace University for the FTC Robotics competition I started searching on the web for what would be available to explore with my camera. As I mentioned in a previous post I didn’t research deep enough and feel I missed some great opportunities but too late to cry about that any more. The very first attraction I found that I wanted to capture was the Tarrytown Light.

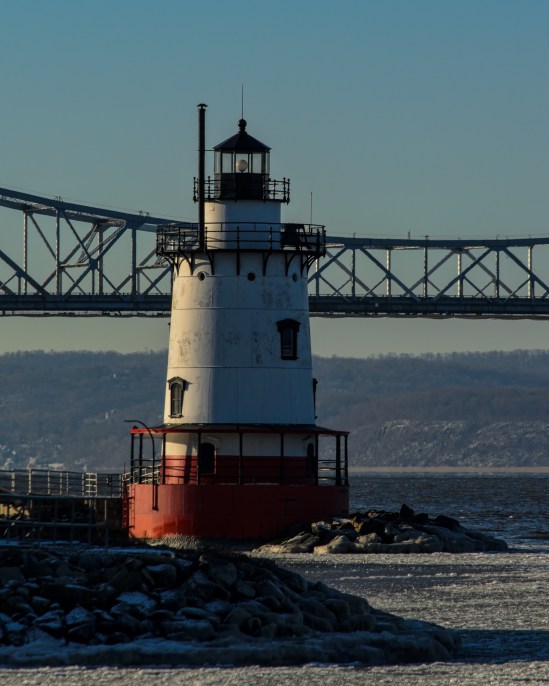
The Tarrytown Light is a small lighthouse on the east side of the Hudson River in Sleepy Hollow, NY. The main attraction for me, besides just being a cool lighthouse, was the ability to have the Tappan Zee bridge in the background with the lighthouse. I thought there would be some great possibilities for images. One of my original ideas was to get a late evening, early night capture with the bridge lights in the background and maybe even some light reflections off the water.

I did manage to find the Kingsland Point Park which would allow me to get a clear view of both the lighthouse and bridge but when I arrived after dropping my daughter off at the college the first night it was too dark without any park lights to allow me to venture far from the car. The next morning was a much better time for my first trip through the park and resulted in the images below. If it wasn’t almost four hours from my house I would be heading back some time soon to grab that night view.

I will also have to keep an eye on the status of some construction occurring near the lighthouse as it did prevent me from getting closer. Other images I have found on the web appear to be from a very close vantage point and there was a walkway that brings you right past the lighthouse. I’m thinking a weekend trip later in the year!
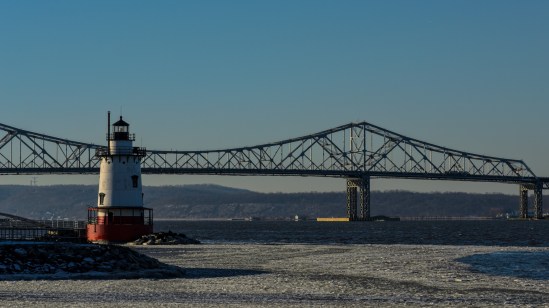
Tarrytown Light and Tappan Zee Bridge Nikon D5100, Nikkor 55-200mm f/4-5.6, 1/400s, 90mm, f/13, ISO 200

Tarrytown Light and Tappan Zee Bridge
Nikon D5100, Nikkor 55-200mm f/4-5.6, 1/400s, 90mm, f/13, ISO 200

Tarrytown Light - Landscape Nikon D5100, Nikkor 55-200mm f/4-5.6, 1/400s, 190mm, f/13, ISO 200

Tarrytown Light – Landscape
Nikon D5100, Nikkor 55-200mm f/4-5.6, 1/400s, 190mm, f/13, ISO 200

Tarrytown Light - Portrait Nikon D5100, Nikkor 55-200mm f/4-5.6, 1/500s, 200mm, f/13, ISO 200

Tarrytown Light – Portrait
Nikon D5100, Nikkor 55-200mm f/4-5.6, 1/500s, 200mm, f/13, ISO 200

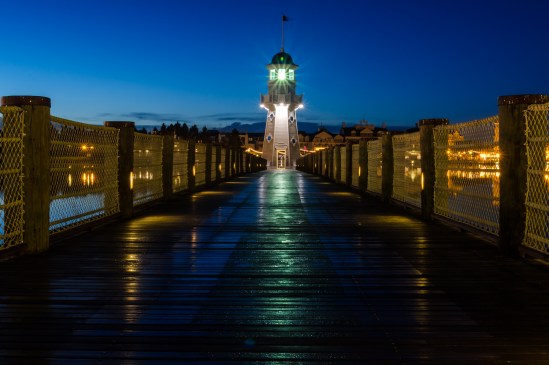
Lighthouse and Dock

Lighthouse and Dock
Nikon D5100, Sigma 17-70mm f/2.8-4, 30s, 26mm, f/22, ISO 250

Day 84

Wow, I have been home for over four hours and just worked my way to my project picture.  To be honest I grabbed a few pictures of the birch tree at work because of the sunlight illuminating it against some great clouds but was anticipating going for a walk when I got home.  As I’m pulling in the driveway the freezing rain was just beginning.  The birch tree was going to have to be the picture.

My 4 hour distraction started when I spotted the ‘Hack This Photo’ post with a picture of the Portland Head Lighthouse.  This is a lighthouse I have visited a few times and photographed myself.  I haven’t participated in this photo editing challenge before but couldn’t resist the subject.  I worked the picture through processing a couple of different ways and ended up learning quite a bit more about Photoshop Elements and processing possibilities.  I have included the two pictures at the end of the post.

The birch tree picture I used for my project is very simple but has great detail within the tree and nice colors provided by the blue sky showing through the white/grey clouds.  The processing on the birch tree was done completely within Lightroom and kept fairly simple.  I think I managed to get quite a lot of it right in camera.

For comparison, here is the SOOC picture:

The first of my distractions for the ‘Hack This Photo’ page was processed very normally for me.  I minor adjustment of the levels, a pass through DeNoise 5 and then a final pass through Adjust 5.  I selected the Dynamic Brightness preset from the HDR Collection to get me started.  I needed to tweak a few of the settings to achieve the look I wanted.  I like what I ended with, but as I mentioned earlier, very normal for me.

I wanted to get out of my comfort zone and try something new.  I decided to edit the picture again this time learning how to apply a texture and create a picture that looked more vintage and aged.  I had just read a post from Melina Ilieva on how to add a texture and create a vintage look for the picture.  This is the article I followed: How to make a photo look like an old photograph.

I am really happy with the way this second picture turned out and I was able to learn a few new things about Photoshop Elements.  This gives me more options when I’m out exploring with the camera.  I have a new trick in my bag…